


Visual Studio providing a feature called Custom Template to create our own project templates(Web,Windows etc,.) and Item templates(Web Form,Class file etc,.). These Templates are used to add/deploy all prerequisities to specified project.
Organizing your custom templates are very easy in VS,we can create our own custome folder with hierarchy for projects and items. Refer the following steps to do organize your custom templates.
- Create your sample template contents and sample.vstemplate file
- Create sample.vscontent file and add your custom folder name in ProjectSubType attribute node to organize your template.Refer the following Sample.vscontent file
Ex:
<?xml version="1.0" encoding="utf-8"?>
<VSContent xmlns="http://schemas.microsoft.com/developer/vscontent/2005">
<Content>
<FileName>SampleTemplate.zip</FileName>
<DisplayName>Sample Test Template</DisplayName>
<Description>Sample Template</Description>
<FileContentType>VSTemplate</FileContentType>
<ContentVersion>1.0</ContentVersion>
<Attributes>
<Attribute name="ProjectType" value="Visual C#" />
<Attribute name="ProjectSubType" value="Sample"/>
<Attribute name="TemplateType" value="Project"/>
</Attributes>
</Content>
</VSContent>
If you want add sub folder then mention same thing in ProjectSubType like Parent\child1\child2 etc. Refer the following Sample.vstemplate file
<?xml version="1.0" encoding="utf-8"?>
<VSContent xmlns="http://schemas.microsoft.com/developer/vscontent/2005">
<Content>
<FileName>SampleTemplate.zip</FileName>
<DisplayName>Sample Test Template</DisplayName>
<Description>Sample Template</Description>
<FileContentType>VSTemplate</FileContentType>
<ContentVersion>1.0</ContentVersion>
<Attributes>
<Attribute name="ProjectType" value="Visual C#" />
<Attribute name="ProjectSubType" value="Sample\Child1"/>
<Attribute name="TemplateType" value="Project"/>
</Attributes>
</Content>
</VSContent>
- Install your Sample.vscontent file
- Open a Visual studio,go to New -> Project,now you can able to your folder hierarchy just like you mentioned in the vscontent file.
A Visual Studio Porject can contains different types of files like code files,normal resource files,embedded resource files, help files etc,each type will have different build action on VS, based on this VS will do the required action on these file i.e code can be compiled and added to assembly, embedded resource file will add to assembly without compile, no action for help files etc. In templates we can set the VS build action for a project item while we creating it. Follow the following steps to apply build action on your project item,
- Open your Sample.vstemplate file.
- Add ItemType attribute to ProjectItem tag with required Build action.Ex:
<ProjectItem ItemType="None" ReplaceParameters="true" TargetFileName="Sample.cs">Sample.cs</ProjectItem>
- Install your current tempalte.
- Open/add project in Visual Studio then add a new item which you created just now and check the build action from the properties of created item.
In this article I am going to explain how to dynamically display all available process templates (Skelta forms which associated with a workflow) to a user on a common page based on skelta list level user access rights.In Skelta there is no component or documentation to list out the process templates,I don't why they haven't given it even though they have API.
When I start working on this requirement really I don't know how to do it, so I communicated with Skelta support to get the solution then they given me a solution with hard coding Skelta form id but this is not exact solution what we want because it had two drawbacks, the first thing is in feature,if Skelta administrator create any new process template then he/she has to hard code the form id with templates showing page but it should not be and next things is we can't use build in Skelta List level security rights feature here otherwise we need a separate module to maintain the security rights externally for all process templates.
After scratching my head with Skelta APIs for a long time I found a solution and it fulfilled all our requirements.Now I ready to share my solution with you all.
Background
Skelta Repository is base container for a Skelta application and each repository contains own set of process flows, forms, lookup lists etc., we can create N no. of repositories on Skelta and these repositories are associated with one user provider (user resource/pool), currently Skelta supporting for four types of user providers those are Forms, Asp.Net user provider, Active Directory and Skelta user provider, in this articles we are using form provider. Skelta has List API to list out all Skelta repository elements like Workflows, Forms and Queues etc., and these lists has own unique list definition for populating the repository elements and Skelta List API will differentiate the repository elements by using this definition.
Since Skelta is using common list API for all repository elements, the base table will have common fields to store all lists’ attributes (name, description and element specific properties etc.).We can get all lists’ attributes by mapping attributes field with base table based on list definition. All Skelta List API build with Skelta security rights API so it can automatically take care about user rights. User security rights can be specified by Skelta repository administrator for a element list while creating it based on these settings Skelta list API displays all available items to specific user against his/her permission.
In Skelta we have staging concept for workflows and forms, those are development stage (draft) and production stage (publish), if you want render a form or create a workflow instance then the specific item should be published then only it will move to production stage to use. Skelta forms and workflow lists are supporting for folder to organize the sub items.
Let’s Get Started
ListItemCollection is main class for access the repository list items; this object required the ListDefinition object and ListDefinition required application object and list name while creating it. GetRecordsFullQueryFieldMapping method of ListItemCollection can list out the mapping fields for given list name, using these fields we can access list specific properties. GetRecordsForConsume can list out all available list items in Dataset and it required four input parameters, those are filter column, filter value, Display Items and user id. We can get a ListItem object with ListDefinition object and List Item id; with this object we can access item level properties.
Following class diagram shows the overview of class structure for listing out the process templates.

Figure: Class Diagram for Process Templates Enumerator
Here ListDefinition class inheriting from SingleTableObjectWithName and this class inherited from SingleTableObject. SingleTableObject is a table entity class and it can associate with a skelta table so we can do query with this object. ProcessTemplateItem is a custom class and it contains some basic information like Application, Associated Workflow, Description, ID and Title.
Note: Above class diagram shows only required properties and methods of ListDefinition, SingleTableObjectWithName, ListItemCollection and ListItem.
Process Templates Class:
using System;
using Skelta.Repository.List;
using Skelta.Core;
using Workflow.NET;
using Skelta.Entity;
using Skelta.Repository.Web.List;
using System.Collections.Generic;
namespace Skleta.ProcessTemplate
{
    public class ProcessTemplates
    {
        public ProcessTemplates()
        {
        }
        ///
        /// List out all available process templates for given user in a skelta repository
        ///
        /// Skelta repository name        /// user id        /// Collection of process templates
        public List GetProcessTemplates(string strApplicationName, int intUserId)
        {
            try
            {
                string colDescription = "";
                string colBoundToWorkFlow = "";
                string colTitle = "";
                ApplicationObject appObject = new ApplicationObject(strApplicationName);
                ListDefinition lstDef = ListDefinition.GetList(appObject, "Forms List");
                Skelta.Repository.List.ListItemCollection lstItmCollection = new Skelta.Repository.List.ListItemCollection(lstDef);
                foreach (KeyValuePair pairFields in lstItmCollection.GetRecordsFullQueryFieldMapping())
                {
                    if (pairFields.Value.Name == "Title")
                    {
                        colTitle = pairFields.Key.ToString();
                    }
                    else if (pairFields.Value.Name == "Description")
                    {
                        colDescription = pairFields.Key.ToString();
                    }
                    else if (pairFields.Value.Name == "BoundToWorkflow")
                    {
                        colBoundToWorkFlow = pairFields.Key.ToString();
                    }
                }
                try
                {
                    //Status = 3 published items
  //Status = 1 draft items
//Get all published items from form list table
                    DataTable dtForms = lstItmCollection.GetRecordsForConsume("Status", "3", Skelta.Repository.Display.AllItems, string.Format("sqlprovider::{0}", intUserId));
                    dtForms.DefaultView.Sort = colTitle;
                    List lstFroms = new List();
                    foreach (DataRow frmRow in dtForms.DefaultView.ToTable().Rows)
                    {
                        Skelta.Repository.List.ListItem itemList = new Skelta.Repository.List.ListItem(lstDef, new Guid(frmRow["Id"].ToString()));
                        ListMainForm frmMain = (ListMainForm)itemList.ListForm.Records[0];
                        if (!itemList.IsFolder)
                        {
                            ListTableForm frmList = (ListTableForm)frmMain.FindById("_sys_fmdef_new");
                            if (string.IsNullOrEmpty(((ListTextDataItem)frmList.Records[0].FindControlByID("_sys_workflow_assn")).Value))
                                continue;
                        }
                        lstFroms.Add(new ProcessTemplateItem() { BoundToWorkflow = Convert.ToString(frmRow[colBoundToWorkFlow]), Description = HttpUtility.HtmlEncode(frmRow[colDescription].ToString()), ID = Convert.ToString(frmRow["Id"]), Title = Convert.ToString(frmRow[colTitle]), ApplicationName = strApplicationName });
                    }
                    return lstFroms;
                }
                catch { }
                return null;
            }
            catch (Exception)
            {
                throw;
            }
        }
    }
ProcessTemplateItem Class:
    public class ProcessTemplateItem
    {
        public string Title { get; set; }
        public string BoundToWorkflow { get; set; }
        public string ID { get; set; }
        public string Description { get; set; }
        public string ApplicationName { get; set; }
        public override bool Equals(object obj)
        {
            ProcessTemplateItem tempItem = obj as ProcessTemplateItem;
            if (tempItem == null)
                return false;
            return tempItem.BoundToWorkflow.Equals(this.BoundToWorkflow) && tempItem.ID.Equals(this.ID);
        }

        public override int GetHashCode()
        {
            return base.GetHashCode();
        }

        public override string ToString()
        {
            return this.Title;
        }
    }
}
Above code snippets shows the actual implementation of Process Template Enumerator, here GetProcessTemplates list out all available process templates for given user, and it takes two input parameters, one is application name and another one is user id (forms provider). Same way you can customize this for other user providers.
Before implementing this in UI,we required following prerequisites.
Workflow:
Follow the following steps create your required workflow.
- Login as administrator in Enterprise console or your custom application.
- Navigate to Worflow List

Figure: Skelta Workflow List - Click on Workflow Ribbon Button then it will popup a window as below.

Figure: New Workflow Window - Enter your Name and Description, here description is mandatory for
workflow initiator form because we going to use while displaying Process
Templates. - Click on Save & Continue, then it will display following screen.

Figure: New Workflow Action Form - Click on Finish button then it will popup the Skelta process designer.

Figure: Skelta Process Designer - Now you design your process flow then close the process designer after
publishing the designed workflow.


Skelta Form:
Follow the following steps to create Skelta form(s).
- Navigate to Skelta Form List.

Figure: Skelta Form List - Click on Form ribbon button ,it will pop up the following screen.

Figure: New Form Creation Window - Enter the form name and description here, and then click on save button
then it shows the following screen.

Figure: New Form Action Form - Click on finish button, it will bring the form designer screen.

Figure: Skelta Form Designer - Here you design your form based on your requirements then publish it.


Workflow Initiator Form:
Do the following steps to associate the created workflow with created form.
- Navigate to Skelta Form List then right click on workflow initiator form then select Associate then it will show the following screen.

Figure: Skelta Form List-Initiator Form
- Select Bind to an existing workflow then select your workflow from drop down list then click on Save button.

Figure: Workflow Mapping Screen


Workflow Initiator Form(Process Template) User Access Rights:
Do the following steps to set user access rights for workflow initiator form.
- Navigate to Skelta Form List then select workflow initiator form.

Figure: Skelta Form List - Click on Security Ribbon button.
- Select Advanced Settings.

Figure: Security Map Settings Screen - Click on Enable List item Specific Security.

Figure: Security Map Settings Screen - Select Resource Mapping then click on Next, it will redirect to Security Group Mapping List.

Figure: Security Map Settings Screen - Click on New Ribbon button to map to new user(s) or role(s).
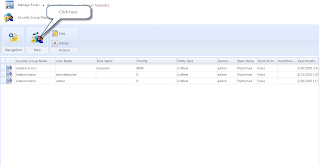
Figure: Security Group Mapping - Map screen will display as follows

Figure: Roles/Users Map Screen - Find role(s) or user(s) based on your requirement then select the contributor for security group drop down then click on Save button.
- Click on Map Users tab to add user(s) then click on User Lookup Icon it will bring a new popup user lookup screen.

Figure: User Lookup Screen - Select your appropriate filter then enter value for filter to search then click on Search button,now user lookup will list out all matched users based on your filter,select users who has the access to use this process template.Finally click on Update button.

Figure: User Lookup Screen - Click on Save button then it will show the successful alert message.

Figure: User Map Screen - Successful Message.

Figure: Successful Message - Now you can see the item(s) which recently mapped on Security Group Mapping List.

Figure: Security Group Mapping List
- Click on Map Users tab to add user(s) then click on User Lookup Icon it will bring a new popup user lookup screen.
- Repeat the step 8 for adding more roles or users.


Once above actions are completed,then we can start UI implementation to displaying Process Templates. Add a new page or user control based on your requirement then add a dropdown list or Listbox or Tree view or Gird on selected container, finally bind the process template list with added data binder control. Here form id is mandatory so it is key/value field, text field may be Title or Description and other fields are optional.
The following code snippet shows the sample Process Template list binding with Telerik’s RadTreeview.
    private void BindProcessTemplate(string strAppName, int intUserId)
    {
        //Get the root node of Rad Treeview
        RadTreeNode nodCompose = this.radLeftMenu.Nodes[0];
        if (nodCompose != null)
        {
            //Create the reference for Process Template Enumerator
            ProcessTemplates prsTemplates = new ProcessTemplates();
            List lstForms = prsTemplates.GGetProcessTemplates(strAppName, intUserId);
            //Iterate thorugh Porcess template list
            foreach (ProcessTemplateItem lstForm in lstForms)
            {
                //Set all necessary attributes to current tree node
                Telerik.Web.UI.RadTreeNode nodRequest = new Telerik.Web.UI.RadTreeNode(lstForm.Title, lstForm.ID);
                nodRequest.LongDesc = lstForm.ApplicationName;
                nodRequest.ImageUrl = "images/request.png";
                nodRequest.ToolTip = lstForm.BoundToWorkflow;
                nodRequest.Expanded = false;
                nodRequest.PostBack = false;
                //Generate the URL Form render page and add to current node,here Form id and application are mandatory for rendering a form
                string strPath = this.Page.ResolveClientUrl(string.Format("AddRequest.aspx?FID={0}&Application={1}", nodRequest.Value.Replace("-", ""), lstForm.ApplicationName));
                nodRequest.NavigateUrl = string.Format("javascript:ShowProcessTemplate('{0}');", strPath);
                nodApplication.Nodes.Add(nodRequest);
            }
        }
    }
Same way you can use other controls like Grid,dropdownlist and according to your choice,you need change the above code.
The following screen shows the sample output of above implementation.

Figure: Process Templates
When user click on available process templates,the selected template form will render on the popup window then user can fill the form and submit to the skelta workflow engine to create a new instance.Refer my article for more information on rendering a Skelta form.
Conclusion:
Now we can able to list out all available process templates to a specific user with out hardcoding the required infromation i.e Form Id, Application Name. Send your feedback to eshock.vasan@gmail.com. Forgive me for my english and you always welcome to edit this article for grammetical and technicle mistakes.
Popular Posts

Popular Posts
-
 The main feature of any workflow engine is tracking the histories of transactions for its process flows, normally all workflow engines will ...
 -
Skelta provides the feature to initiate a workflow from a Skelta form by associating it. In Skelta Enterprise Console they given the provisi...
-
In Skelta BPM.Net 2009 they introduced dynamic form, we can design our required dynamic forms and attach with workflow in form of Invoke For...
-
 In this article I am going to explain how to dynamically display all available process templates (Skelta forms which associated with a workf...
 -
 Recently I created one control library in C#.Net for Windows application. In this section we going to see how to use it. Smart Hot key handl...
 -
Visual Studio providing a feature called Custom Template to create our own project templates(Web,Windows etc,.) and Item templates(Web Form,...